How to setup your project workflow 🧩
Upbase gives you two simple ways to organize how work moves through a project. Choose the option that best fits how you like to work.
In this article
Option 1: Use sections (recommended)
Option 2: Use a Status dropdown custom field
Option 1: Use sections (recommended)
Sections are the easiest and fastest way to set up a workflow.
You can group tasks into sections like To do, Doing, Review, and Done to see progress at a glance. This works well for most projects and requires very little setup.
Create sections
By default, new projects are grouped by section.
Click Add section to create a new one.

Rename or customize a section
Click the ellipsis (•••) next to a section name to rename it or change its color.

Option 2: Use a Status dropdown custom field
You can also manage your workflow using a dropdown custom field.
Create a Status field
Create a dropdown custom field called Status, with options like To do, Doing, Review, and Done.
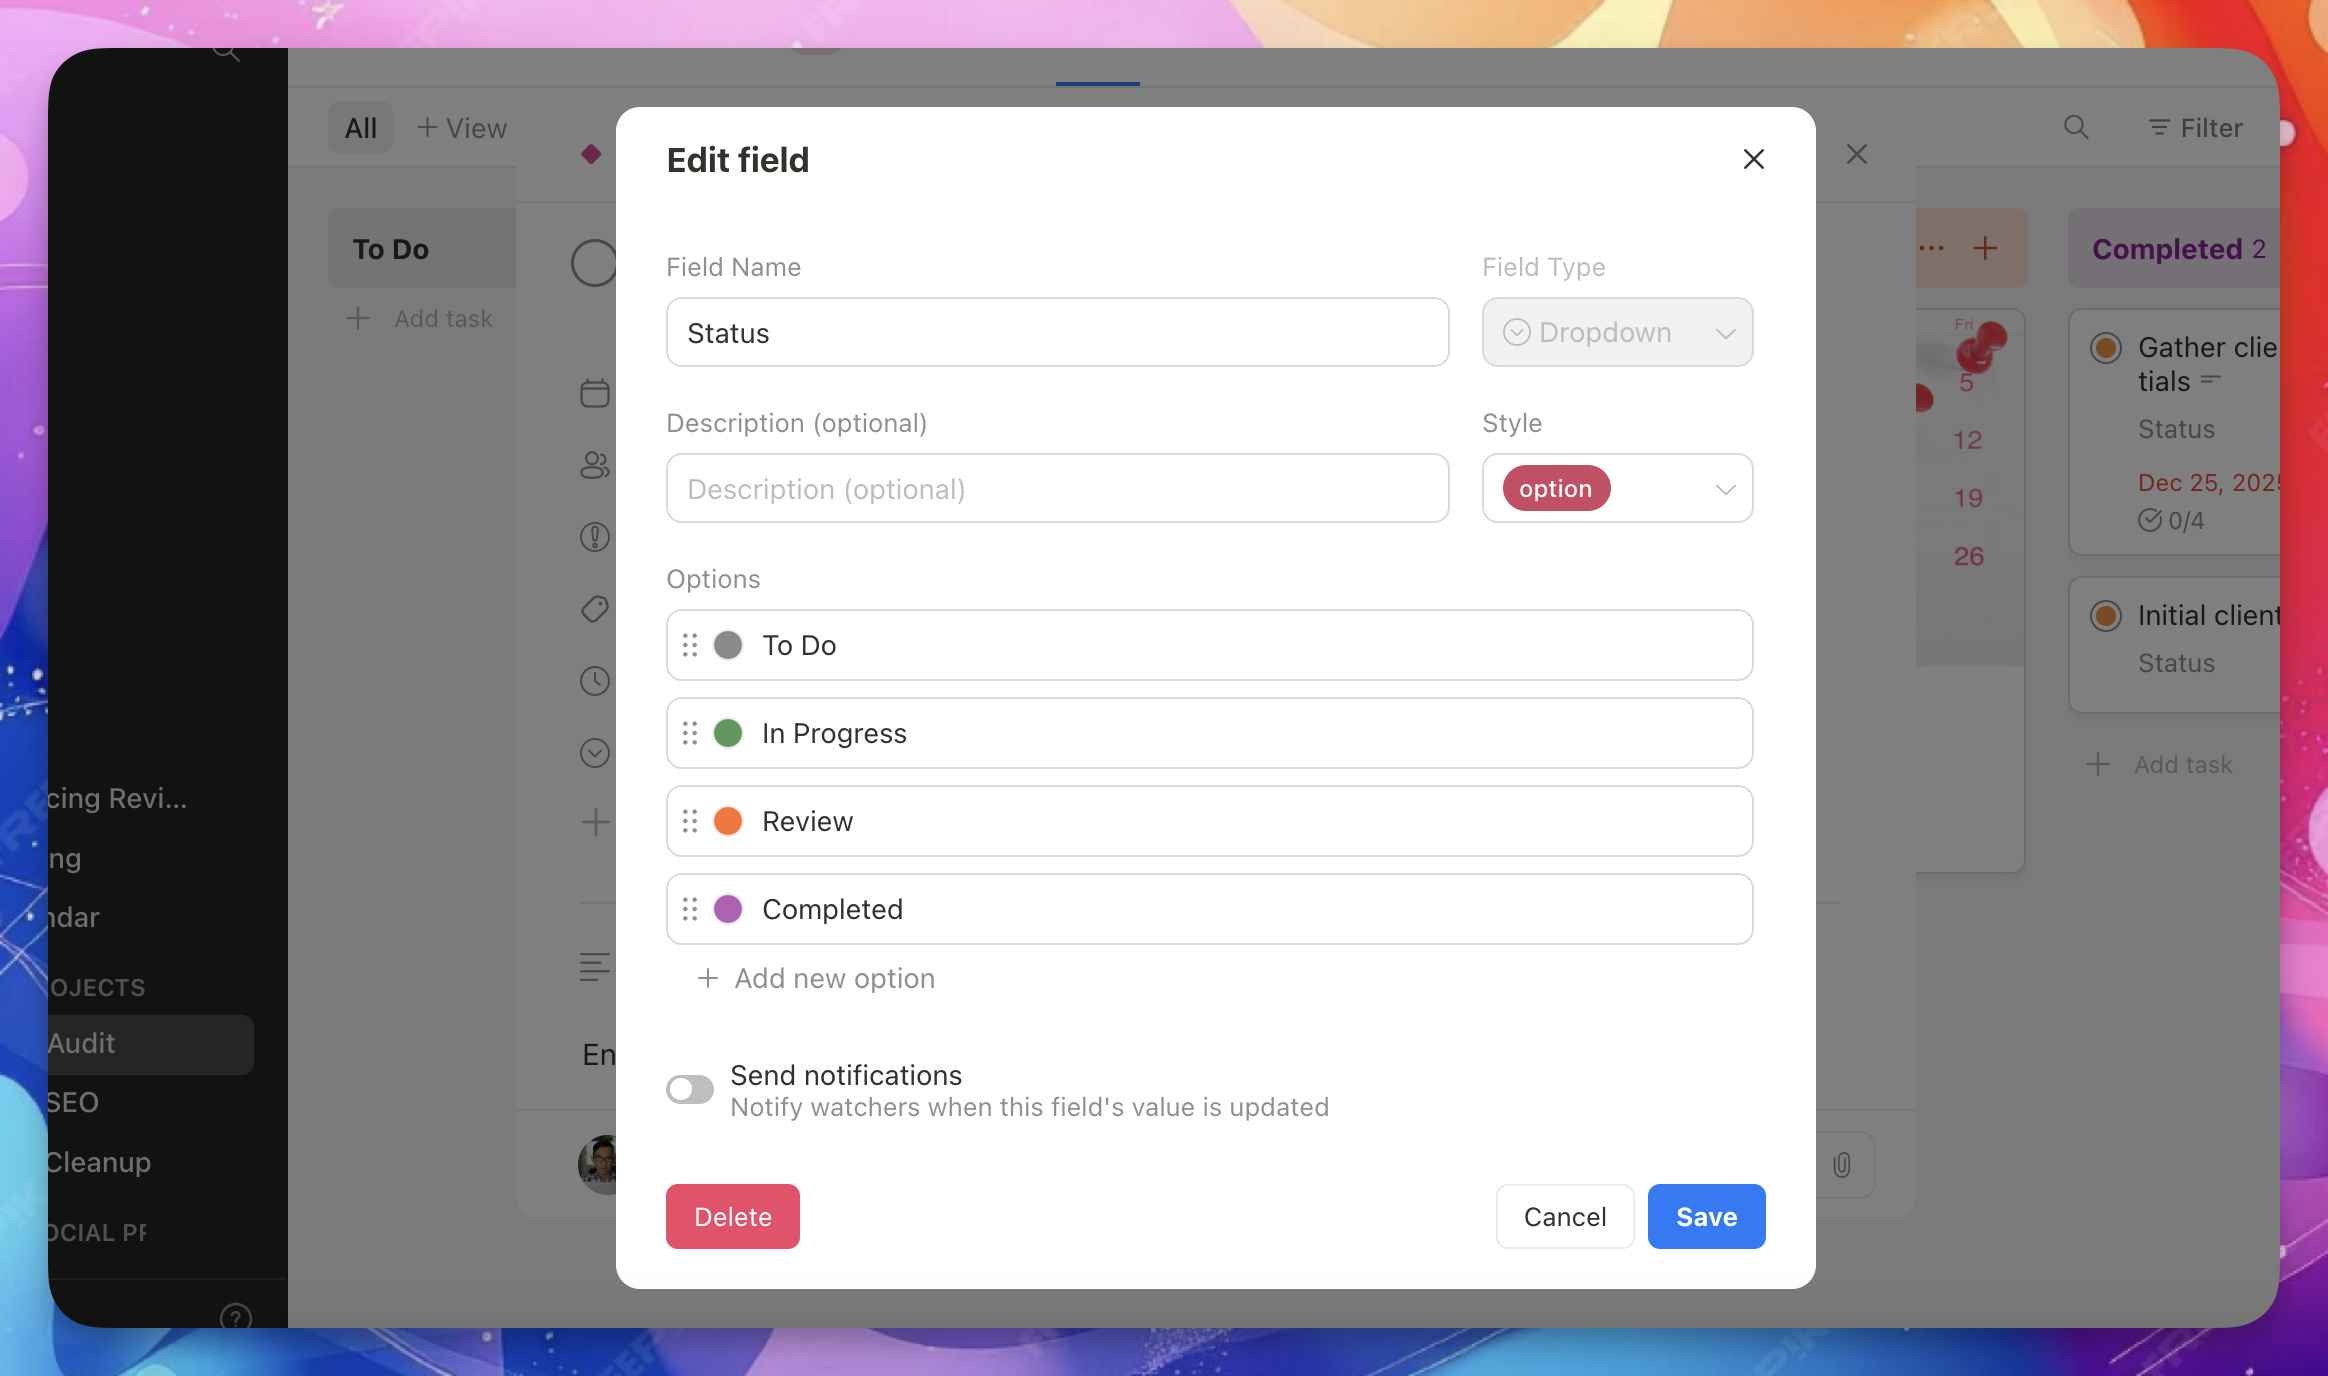
Once created, the Status field appears in every task in the project.
Reuse the same workflow across projects
You can make the Status field a global custom field so the same workflow is available in all projects.

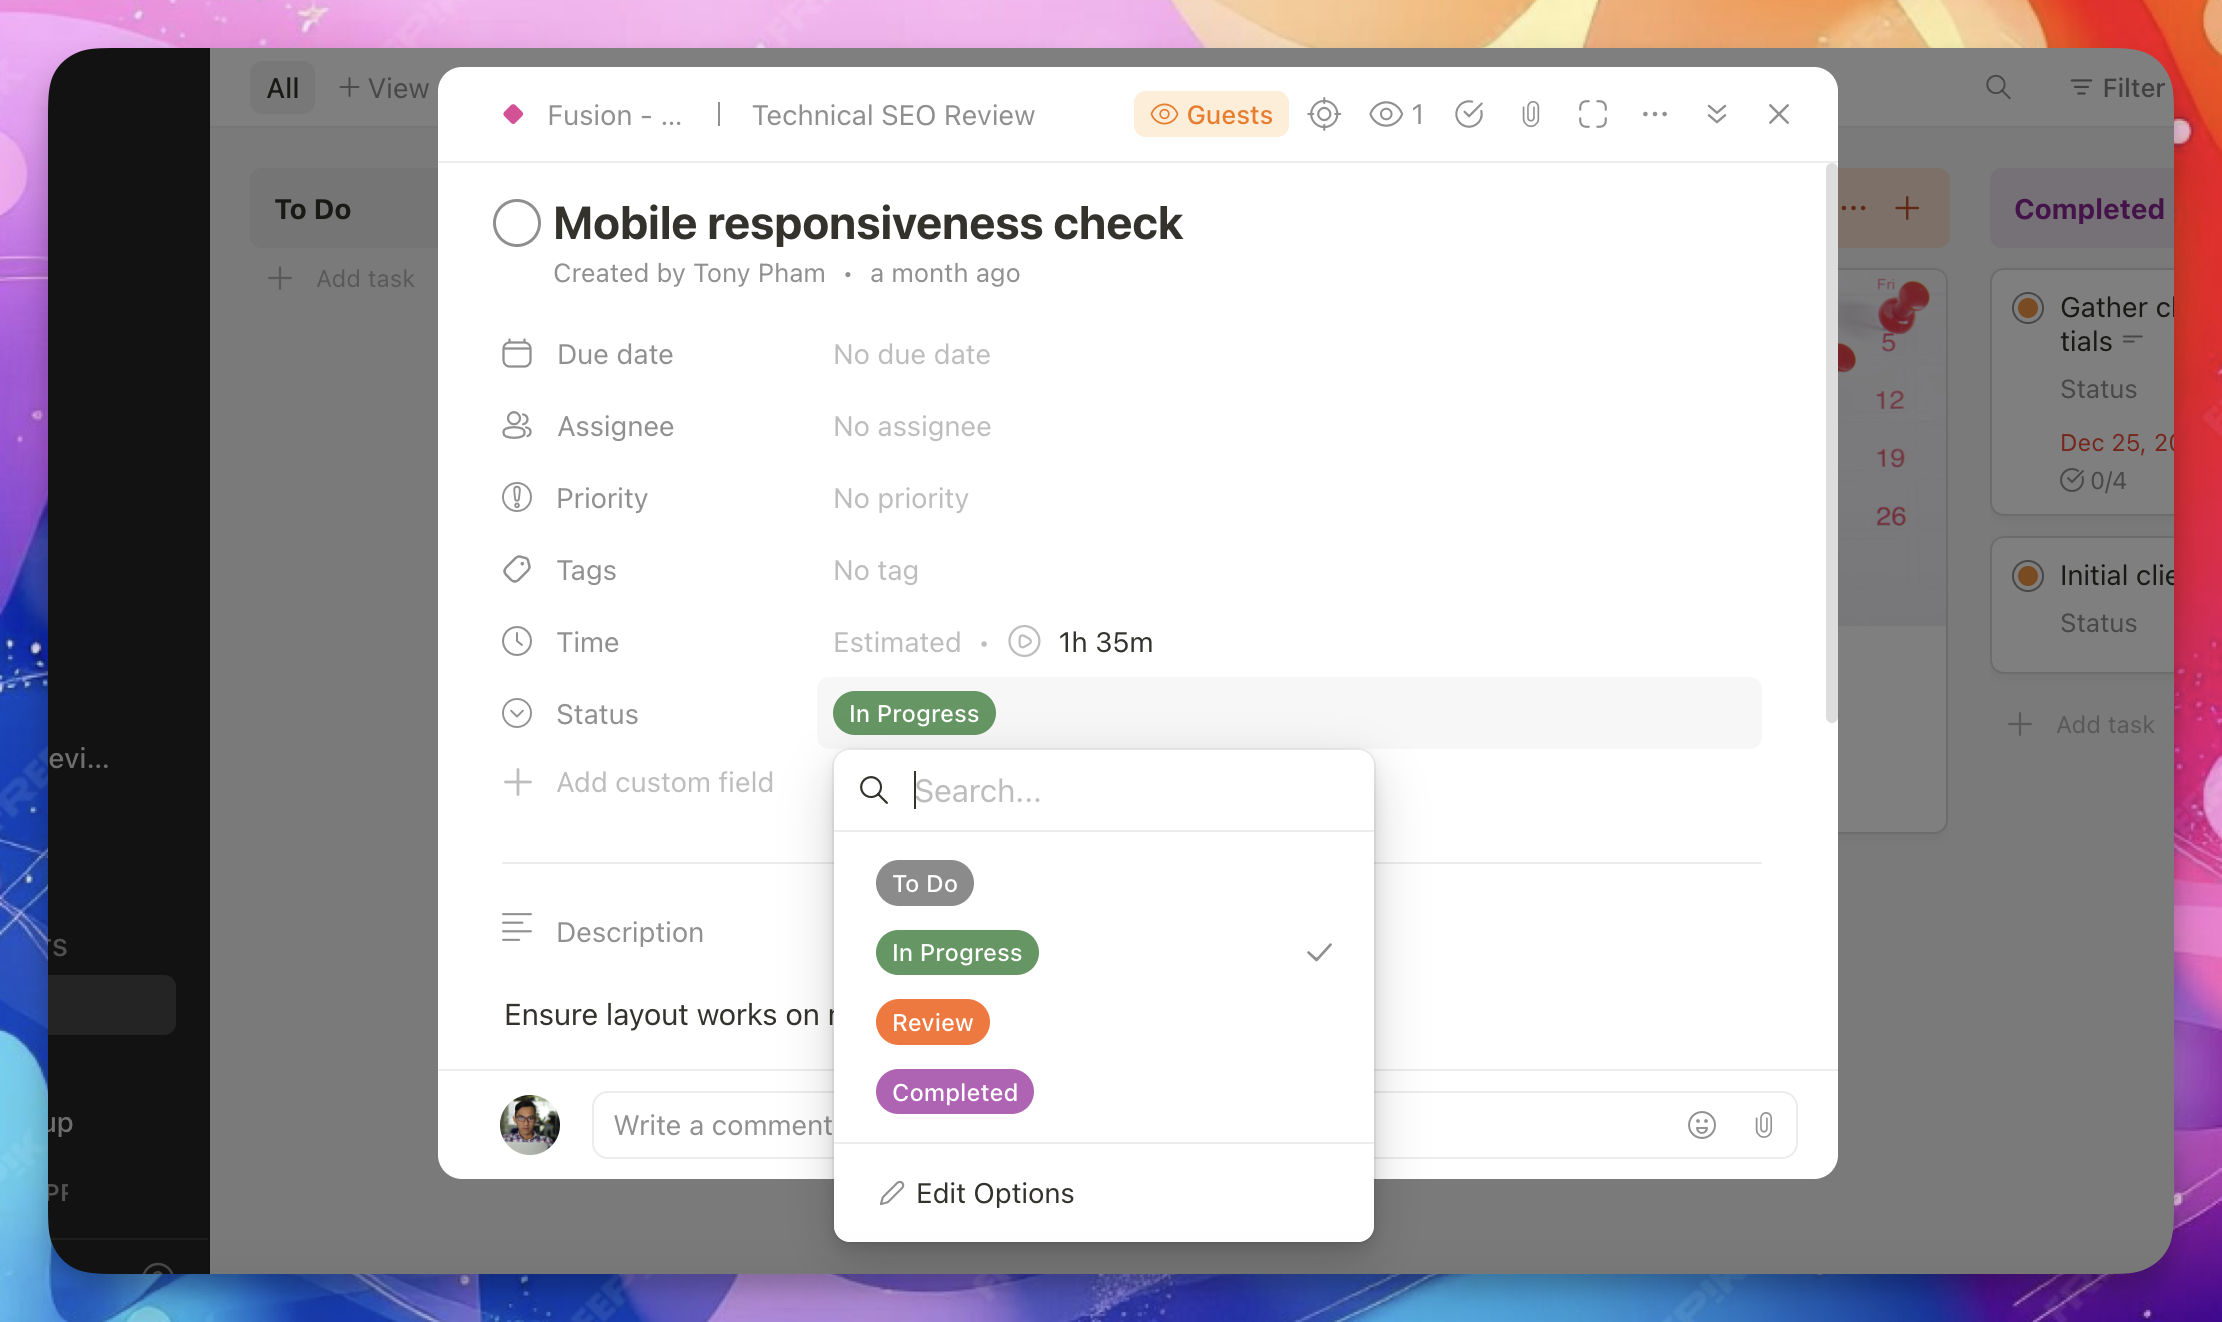
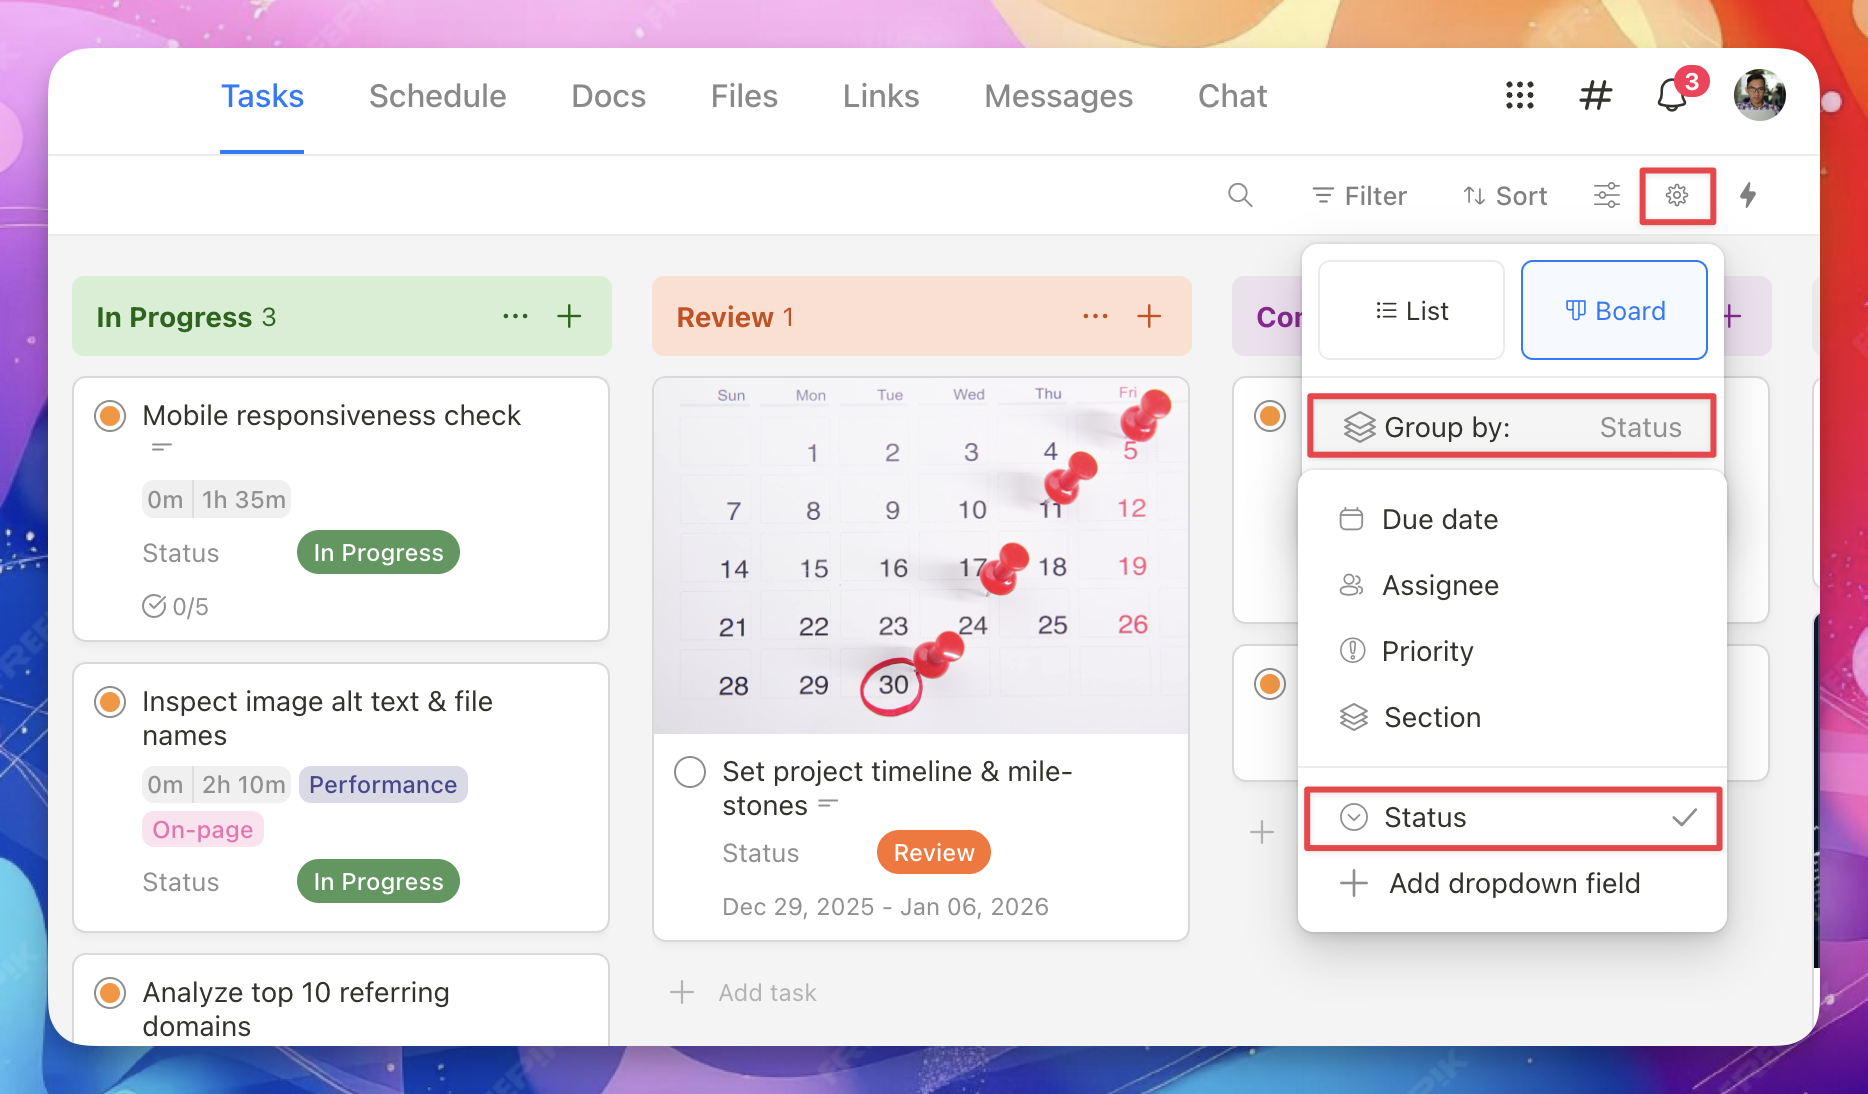
Group tasks by Status
After setup, group tasks by the Status field to see your workflow clearly.
💡 Pro tip
Upbase automatically creates a default Status dropdown field and makes it global for you.
To customize it:
- Go to Project Settings
- Open Custom fields
- Edit the Status field to match your workflow and turn it on

Set up automations (optional)
Automations help reduce repetitive manual work by automatically updating tasks based on rules you define.
Common automation examples
- When a task is added to a section → assign a person
- When a task is marked complete → move it to another section
- When a task moves to a section → add tags or change the due date
You can combine multiple actions in a single automation.
Create an automation
Click the ⚡ Flash icon in the top-right corner of your project to open the Automations panel.

Choose a trigger, then add one or more actions.

For a full walkthrough, see Automations in the help center.
Add a custom view (optional)
Custom views let you see only the tasks that matter to you, using your own filters, sorting, and layout.
You can create multiple custom views inside a project.
Create a new view
Click Add view, then choose how you want to see your tasks — List or Board.

Name your view
Give your custom view a clear name so it’s easy to find later.

Customize and save

Set your preferred:
- Filters (which tasks to show)
- Sorting (how tasks are ordered)
- Grouping (how tasks are grouped)
If you want the view to be visible only to you, turn on Private view before saving.
Click Save view when you’re done.

Good to know
- You can create as many custom views as you need
- Private views are only visible to you
- Saved views help you switch contexts quickly without changing the main project layout