Add tasks via email
With this feature, you can effortlessly create tasks right from your email inbox.
If this feature isn't working, try sending a test email in plain text to the project's email address to see if a task gets added. Please note that there may be issues with creating a new task in Upbase if you forward an email with an uncommon encoding type.
Here's how it works:
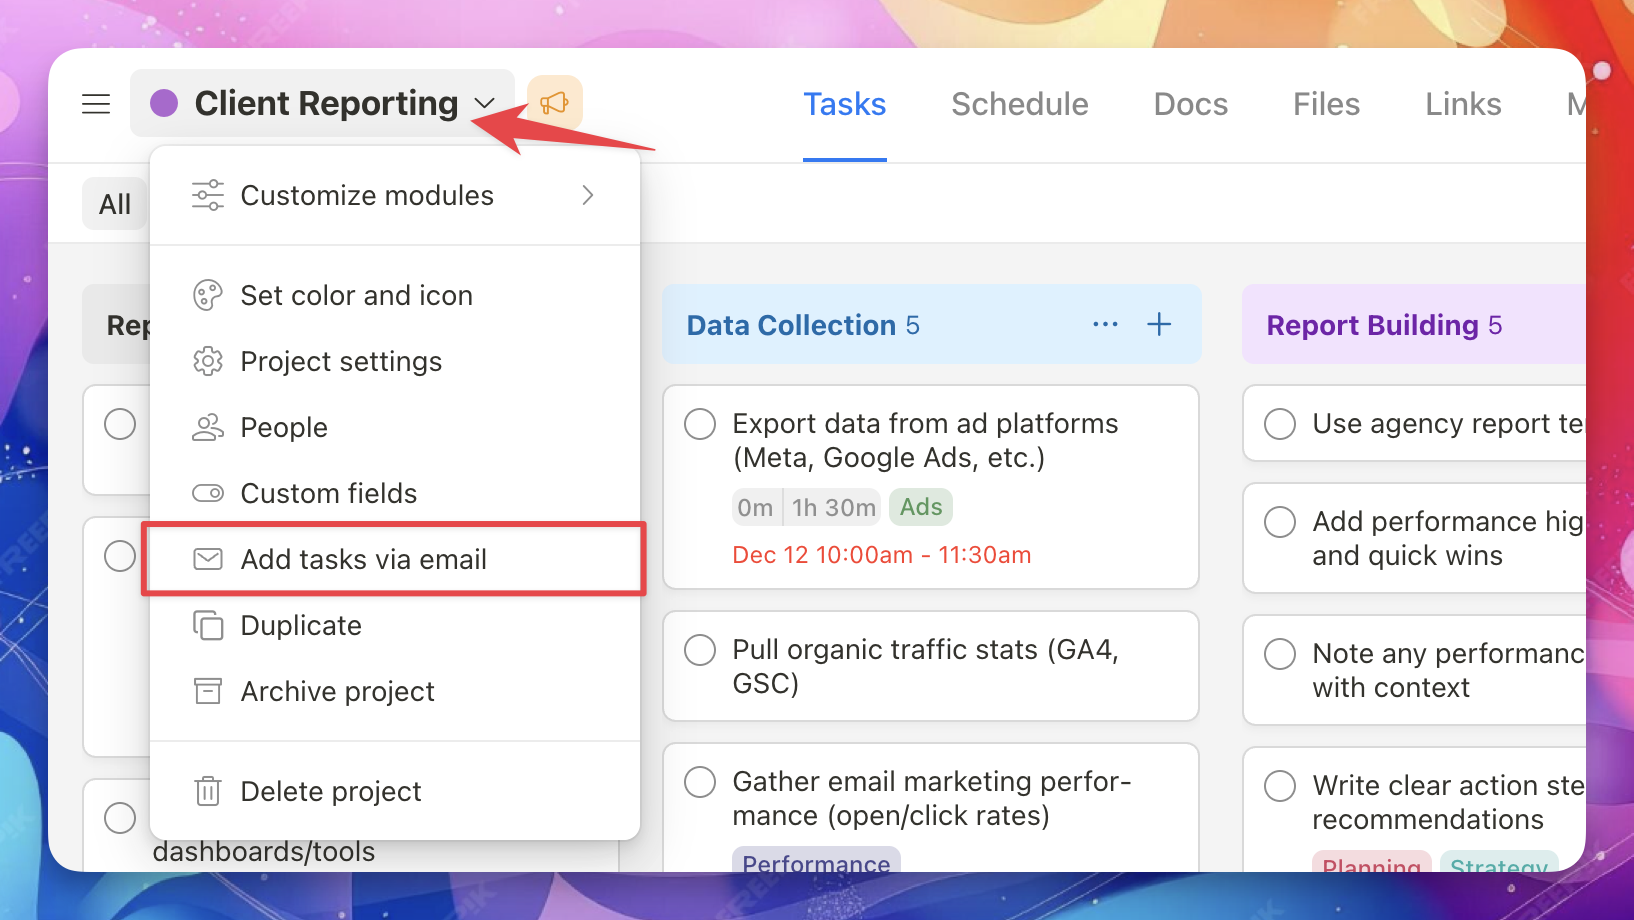
Click on the project name located in the top sidebar and choose "Add tasks via email."
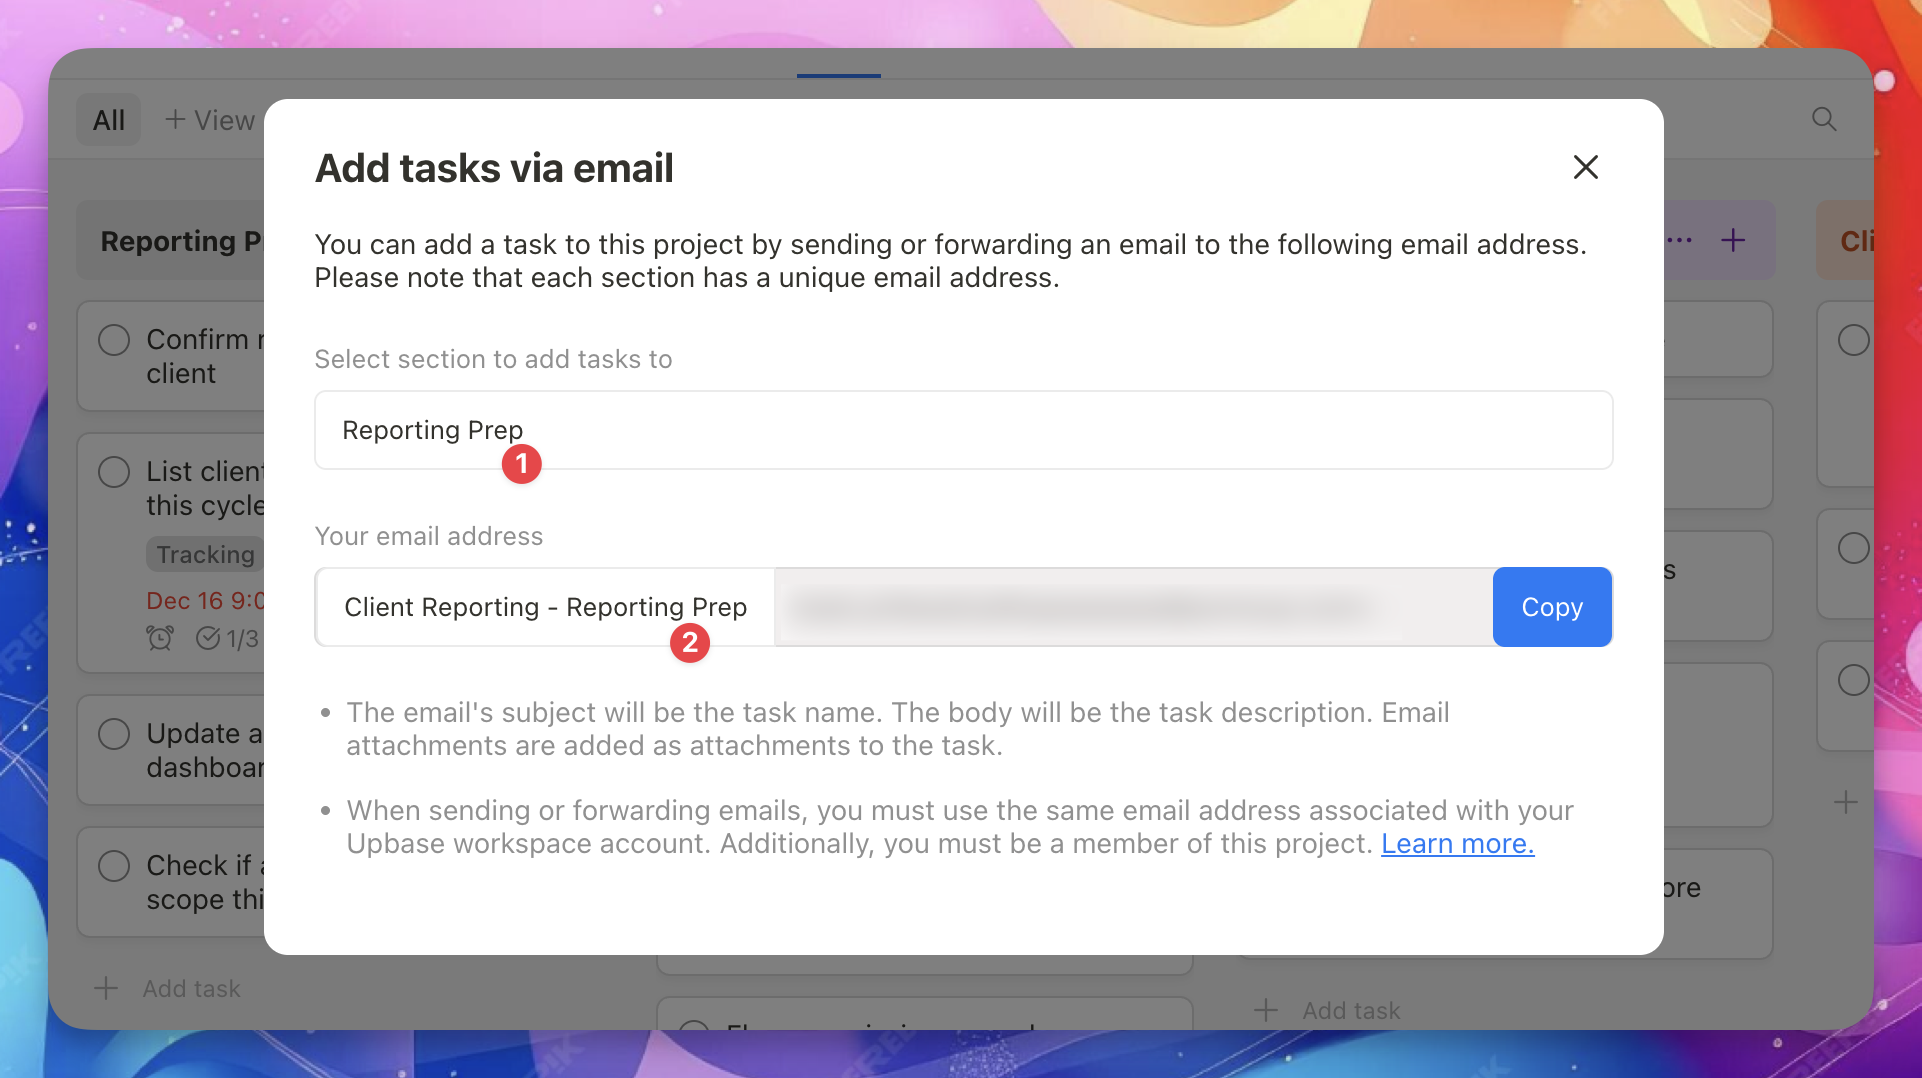
In the popup for "Add tasks via email," you'll find the designated email address to send your emails to.
- The subject of your email becomes the task's name, while the email body transforms into the task's description. Any attached files in the email become task attachments.
- When sending or forwarding emails, you must use the same email address associated with your Upbase workspace account. Additionally, you must be a member of the project.
Important Notes:
- Each section within the project has a unique email address. This means you can add tasks to different sections by sending emails to these unique addresses. When you choose a section to add tasks to from the dropdown (1), the associated email address will update accordingly.
- Guests cannot view these unique email addresses in Upbase. However, guests can add tasks via email if the unique email address is shared with them.
- By default, the email name follows the format "[Project Name] - [Section Name]." However, you can customize it (2) to your preference.
- Click the copy button (3) to easily copy the email address of the section. This is the address you'll send or forward emails to.
- Pro tip: Save these addresses in your contacts for quick future access.
- Currently, it's not possible to include assignees, due dates, or watchers in the tasks when using this email feature. However, we do have plans to introduce these options in the near future.